
In the current digital technology, security is a top concern, especially when setting up an account on Crypto exchanges. To secure your trading account, you will be required to perform 2-factor authentication (2FA Verification) through the Google Authenticator app.
In this article, I introduce to you what Google Authenticator is and how to install, use and restore Google Authenticator step by step the most detailed!
What is Google Authenticator?
Google Authenticator is an application that generates a code used to log in to an account consisting of 6 random numbers with an expiry date of only 30 seconds. After 30 seconds, the application will automatically generate 6 other random numbers and so on continuously.
With this app you can generate a unique code to sign in to your google account. Therefore, it is an indispensable tool when you use an application that requires high security.
Why should you use Google Authenticator?
The Google Authenticator app generates a one-time verification code when you don’t have an Internet connection or cellular service.
After you install the Google Authenticator app, you won’t need to receive verification messages sent to your phone.
Instructions for setting up Google Authenticator
Enable 2-Factor Authentication on Google Account
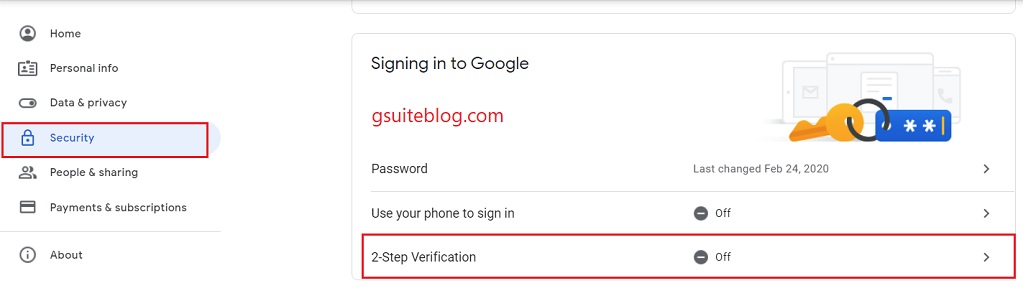
Step 1: Go to the account settings page and sign in to your Google account.
In Security, under Signing in to Google, select 2-Step Verification.
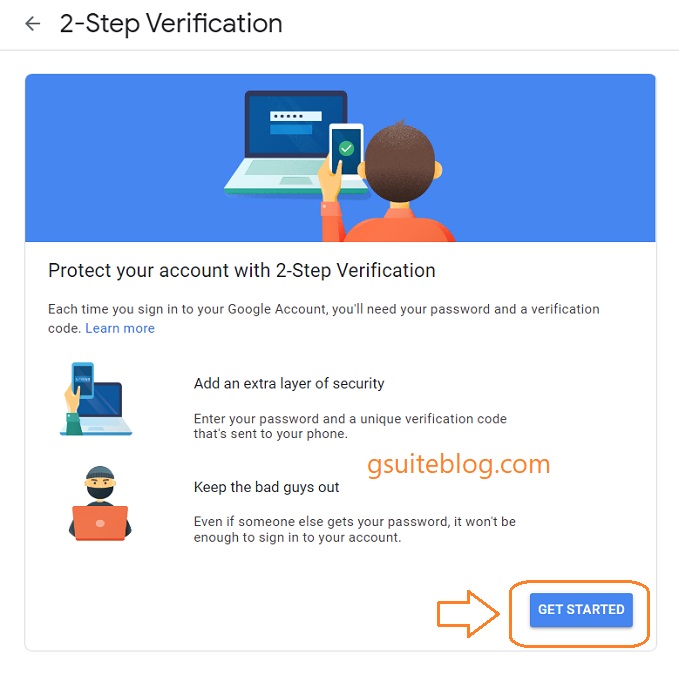
Step 2: Select Get Started to continue.
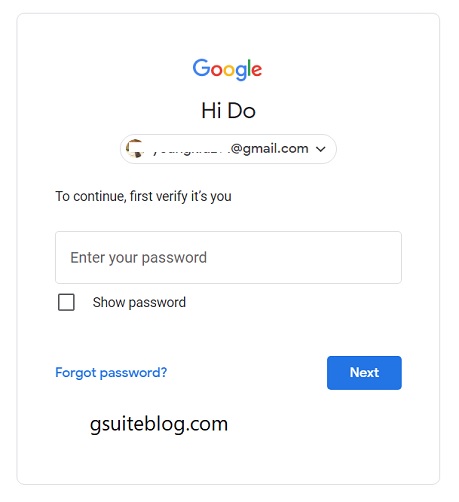
Step 3: Enter the password for your Google account and select Next.
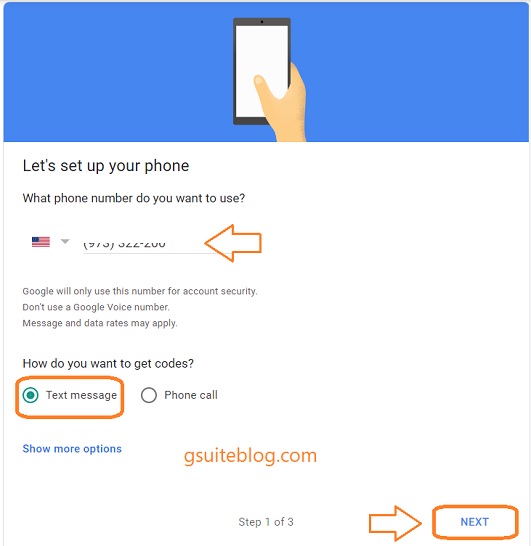
Step 4: Select Continue to have Google set up verification based on your phone.
You enter the phone number, choose the method to receive the verification code and click Send.
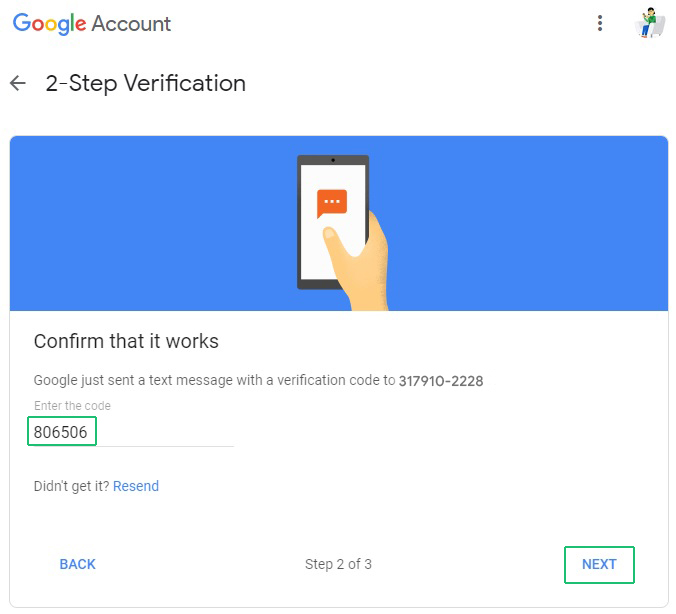
Step 5: Once you have the verification code, enter the code and click Next.
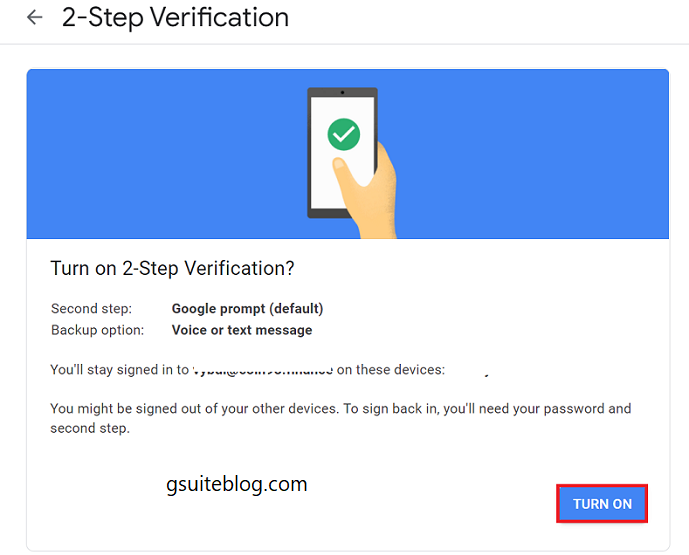
Step 6: Select TURN ON to enable 2-factor authentication.
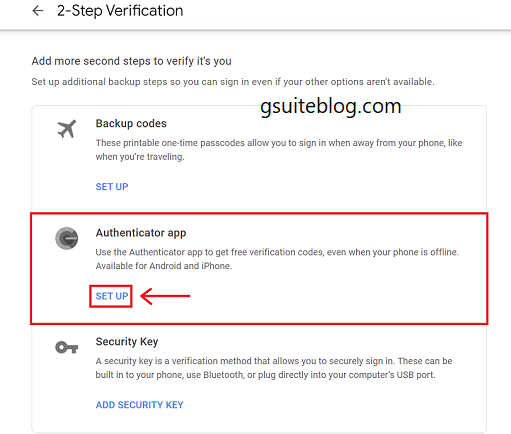
Step 7: In the 2-Step Verification section, click SET UP in the Authenticator app section.
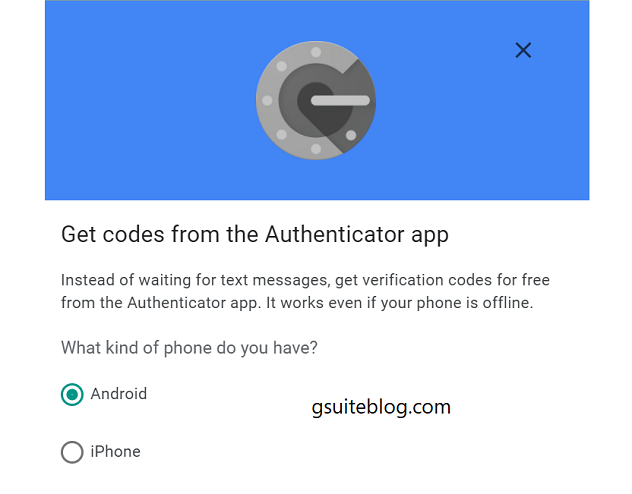
Step 8: In the dialog box that appears, select your phone’s operating system type and select Next.
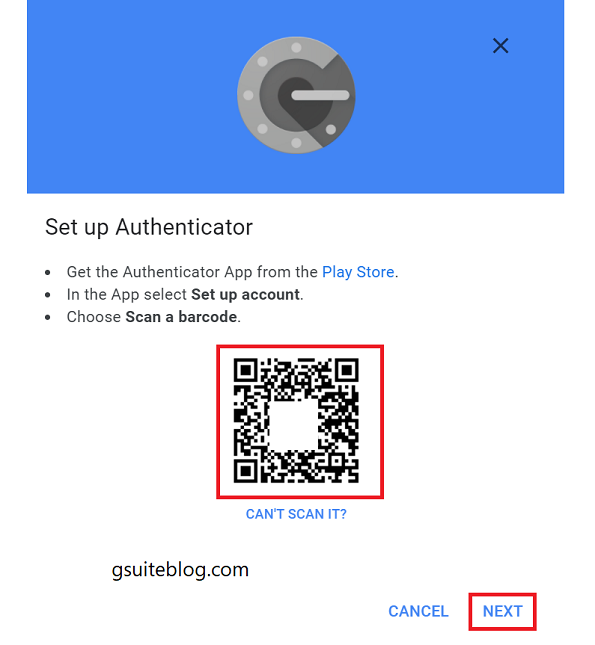
Step 9: QR code or barcode is displayed.
You just need to download the Google Authenticator App on your phone:
- Download the Google Authenticator App on iOS here.
- Download the Google Authenticator App on Android here.
After downloading Google Authenticator on your phone, open the app ⇒ Select the + sign in the bottom right corner ⇒ Select Scan QR code ⇒ Scan the code displayed on the dialog box as below ⇒ Select Next.
Step 10: Enter the 6 numbers displayed on Google Authenticator App and select Verify.
Note: You need to enter this authentication code correctly, as it will be changed every 30 seconds.

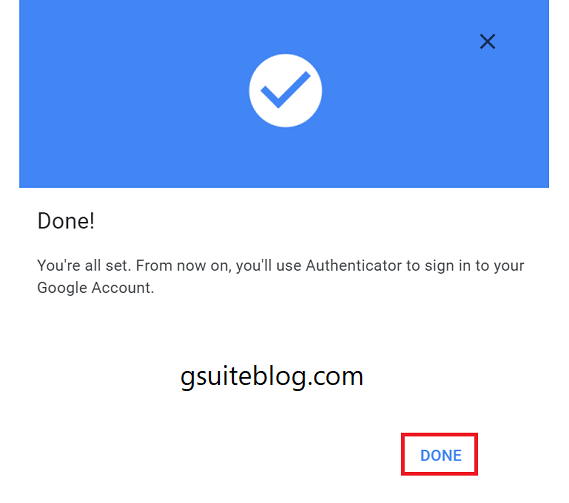
Step 11: Select Done and finish.
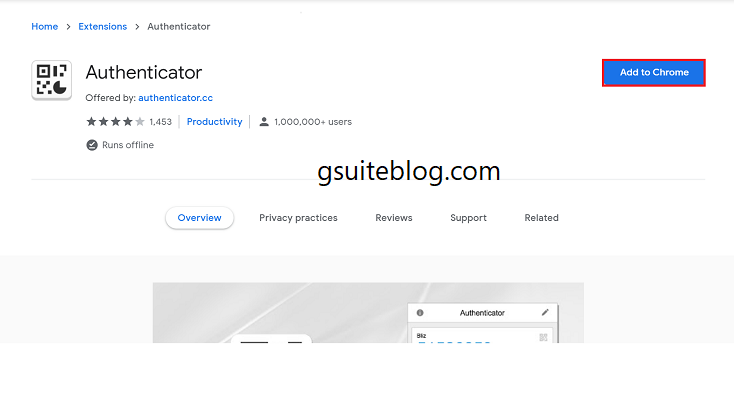
Install Google Authenticator for Chrome
Google Authenticator is not currently available for Chrome on PC. But you can use another utility with similar features, Authenticator. You can rest assured that this application still meets the security requirements, because it uses the API provided by Google Authenticator.
Step 1: Install Authenticator Extension on Chrome browser here.
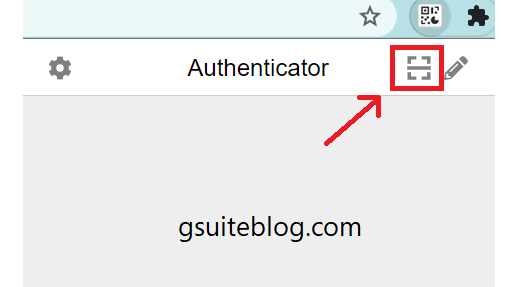
Step 2: Reopen the 2-factor authentication QR code of your Google account.
Click on Authenticator Extension, select Scan QR code and use your mouse to scan the code according to the instructions.
Install Google Authenticator on Android phone
Step 1: Download the Google Authenticator app for Android here.
Step 2: After the installation is complete, open the application and click the “+” sign at the bottom right corner of the screen.
Step 3: Select Scan QR code to scan the QR code.
Install Google Authenticator on Iphone
Step 1: Download the Google Authenticator app for iOS here.
Step 2: After the installation is complete, open the application and click the “+” sign at the bottom right corner of the screen.
Step 3: Select Scan QR code to scan the QR code.
Install Google Authenticator PC on Windows
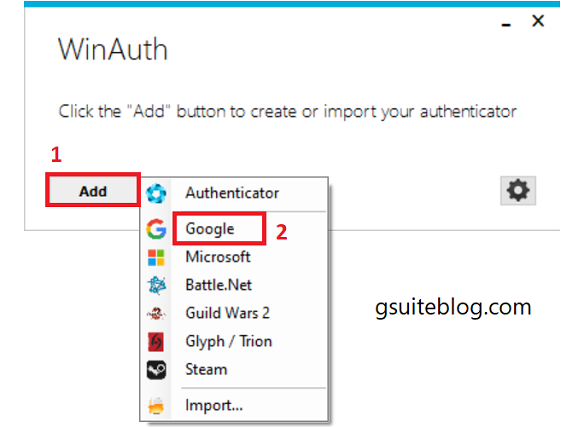
Google Authenticator doesn’t have software for Windows, but you can use WinAuth.
Step 1: Download WinAuth software here. Unzip and install it on your computer.
Step 2: To use Google Authenticator in WinAuth, select “Add” and select the “Google” option.
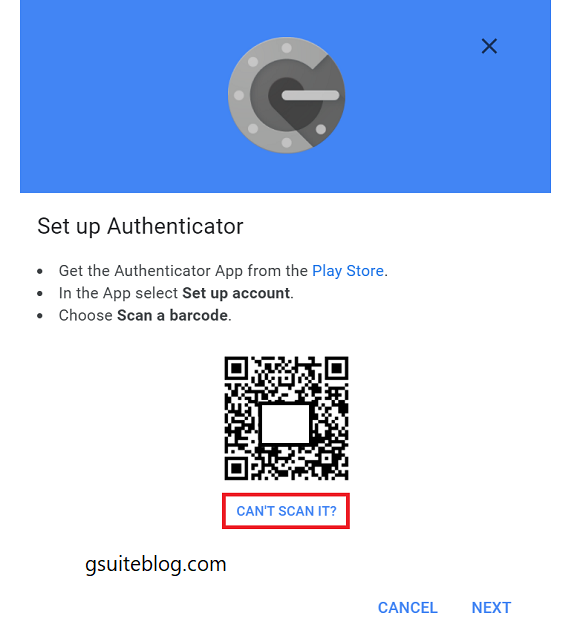
Step 3: Reopen the 2-factor authentication QR code of your Google account.
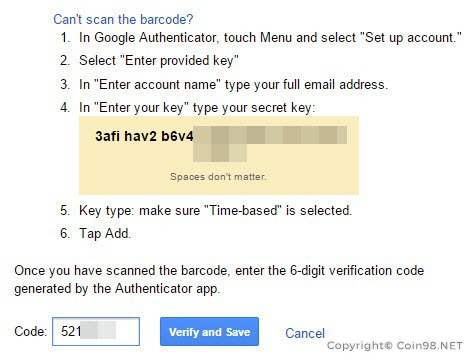
WinAuth does not support scanning QR codes, so select “Can’t scan it?” to enter manually.
Step 4: Paste the secret code into the WinAuth window, select Verify Authenticator.
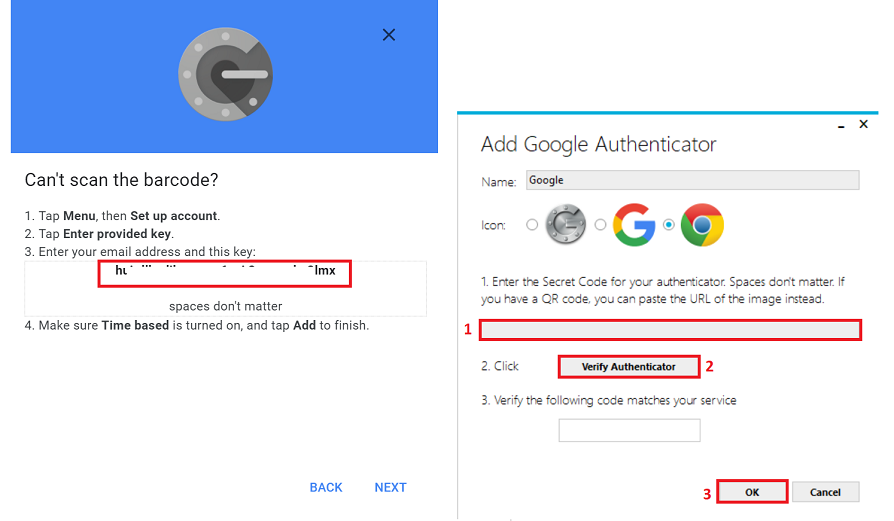
Step 5: Copy the generated 6-digit code and paste it into your Google account, select “Verify and Save” to verify.
Google will display a success confirmation window. Select Ok and finish.
Compare Authy vs Google Authenticator
Authy is a 2-factor authentication (2FA) application similar to Google Authenticator, but here are some differences between Authy and Google Authenticator:
Google Authenticator
- Operating system: Android, iOS, Chrome, Windows,…
- Works on only 1 device.
- When you switch to a new phone, you need to log in to your Google account and change your phone number.
Authy
- Operating systems: Android, iOS, Windows, Mac and even Chrome browser applications.
- Use for multiple devices at the same time.
- Allows you to back up all your accounts. When you want to transfer your Authy account to a new device, you just need to log in and authenticate the account.
Transfer Google Authenticator to a new phone
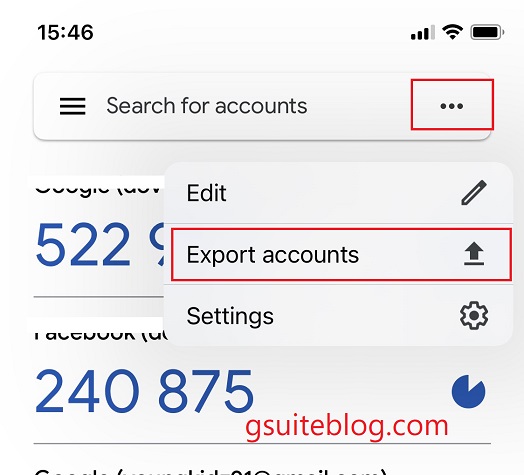
Step 1. Open the Authenticator app on your old phone, tap More ![]() then Export Account then Continue.
then Export Account then Continue.
Select the account you want to transfer to your new phone, then tap Export.
Step 2. Install the Google Authenticator app on your new phone.
At the bottom of the screen, tap Import existing accounts?.
Step 3. Tap on Scan QR code.
After scanning the QR code, you will receive a confirmation that your Google Authenticator account has been transferred. You can remove the exported account from your old phone.
Above is an article on how to install and use Google Authenticator for 2-step verification of Google. Try this useful application to increase the security of your account. Good luck!